
Having a mantle to decorate has been such fun for me this past year since we moved into our house! When I took down our winter banner and left the hooks blank for a while, the boys decided they would take a turn at sprucing up the area…

Not really my style, but they are creative! I did want to get them involved with making our summer banner, and our brand new Cricut from Staples was just the thing to help us!

I’ve been wanting this bad boy – the Cricut Expression – for a while now and we are having so much fun using it! I’m really looking forwards to using it for school projects this next school year as well – I have lots of ideas!
But let’s get back to this summer tag banner so you can make your own!

What you’ll need:
- Cricut machine {or other die-cut machine or scissors!}
- Colorful paper – we used construction paper and magazines! Scrapbook paper works really well, but we used what we had!
- Mod Podge or glue
- Twine or string – whatever you want to use to string up the tags!
What to do:
Choose a tag shape for the base of your banner. The tag reminded us of travel and we do a lot of that in the summer, so it seemed like a good fit! The boys chose yellow paper because of the summer sun! We used the tags on the Plantin School Book Cartridge and made them 6 inches tall.
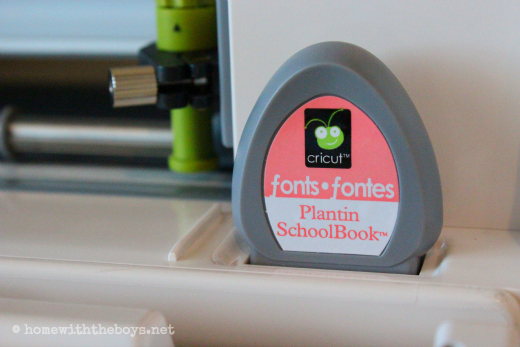
The Cricut Expression came with two cartridges – the basic font one shown above and one with one designs called Accent Essentials. There are tons of other cartridges to buy, but we’re having fun with these for now! With three boys in the house, I might have to get this All Sports cartridge someday!
After cutting out your tags – we made six for the letters of SUMMER and two for decorative tags at each end – do a test letter of your biggest letter to figure out a font size. We used the M as our test letter since it was the widest. This part will take a little experimentation.

We also decided to use old magazines for the letters. Honestly, it probably wasn’t the best choice because they didn’t cut well every time, but I had the boys pick colorful outdoor scenes out of the magazines to give the banner another fun dimension! I really like how the letters turned out once they did work! You could pick fun summer scrapbook paper to achieve a similar look without the difficult cutting!
After cutting out the letters, the boys chose a couple of sun patterns from the Accent Essentials cartridge. I think they made cute book ends to the letters! You can spruce yours up however you want!

The letters need to be attached to the tags now. I opted for Mod Podge, but glue would work just fine. To make sure the banner would keep well for possible later use, I also laminated each tag, but this is not necessary. I just like to laminate.
The last step is to string those letters up! String, twine, yarn – any of these would work. I have a ball of twine I’ve been using for all of my banners and I like the earthy look, especially for this outdoor-inspired banner!
And voila! Here is our finished project…
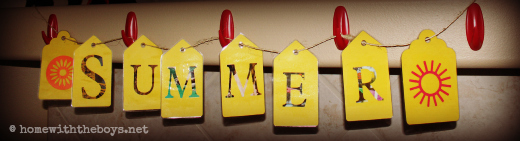
I loved that we worked on this together – the boys were able to pick out paper and designs and push buttons on the Cricut while I dealt with the actual loading of the machine, Mod Podge, and banner hanging! It makes me smile every time we walk in the room!
A few words about the Cricut:
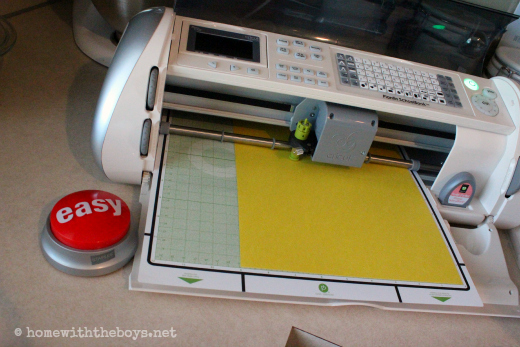
I was actually quite surprised at how EASY it was to get everything set up and running {of course, that button has been pushed to death by the boys – and maybe the adults as well}! I had read some negative reviews, but I’ve loved working with the Cricut Expression! We’ve found lots of different ways to use it and it has performed very well at cutting everything we’ve tried! I’m thinking about ordering some iron-on paper to make some fun t-shirts for the boys!
Staples carries a wide selection of Cricut items – from machines to cartridges to replacement blades and mats! And I’ve been really happy with the customer service I’ve received from them, both in the store and online! They’re fun to tweet with as well at @Staples!
What kind of summer decorating have you done?
Full disclosure: Staples.com provided me with these products for review. The thoughts and opinions expressed are strictly my own. Feel free to shop their entire line of crafting and back to school supplies online.
 I'm Erin, a wife, boy mom x 3, writer, and runner in Nebraska! I'm excited to share all my favorites relating to faith, family, fashion, and fitness in this space! Enjoy!
oh how fun! the yellow is so happy! and i do love the creativity of how your boys added their own touch to the hooks! 😉